How to make Geode Cake
A geode cake is a beautiful and artistic dessert inspired by the natural beauty of geodes, with a crystal-like interior that sparkles and shines. It's a perfect choice for those looking to add a touch of elegance and sophistication to their celebrations. In this guide, we'll walk you through the steps to create your own stunning geode cake that will leave your guests in awe.
Ingredients:
For the Cake Layers:
- Your favorite cake recipe or pre-made cake mix
- Ingredients required for the cake recipe (such as flour, sugar, eggs, butter, etc.)
For the Buttercream Frosting:
- 3 cups (360g) powdered sugar
- 1 cup (226g) unsalted butter, softened
- 1 teaspoon vanilla extract
- 2-3 tablespoons heavy cream or milk
- Gel food coloring (colors of your choice)
For the Geode Decoration:
- Rock candy or sugar crystals (colors of your choice)
- Edible silver or gold luster dust
- Clear piping gel or corn syrup
Additional Tools and Supplies:
- Cake leveler or serrated knife
- Offset spatula
- Piping bags and tips
- Small paintbrush
- Food-safe gloves (optional)
- Cake turntable (optional)
Equipment:
- Round cake pans (6-inch, 8-inch, or 10-inch, depending on your preference)
- Cake boards or serving platter
- Mixing bowls
- Electric mixer (handheld or stand mixer)
- Spatula
- Cooling rack
Step-by-Step Instructions:
1. Bake the Cake Layers:
- Prepare your chosen cake recipe according to the instructions, or use a pre-made cake mix.
- Divide the batter evenly between the round cake pans.
- Bake the cake layers according to the recipe instructions and let them cool completely on a wire rack.
2. Prepare the Buttercream Frosting:
- In a mixing bowl, beat the softened butter until creamy using an electric mixer.
- Gradually add the powdered sugar, one cup at a time, and continue beating until smooth and fluffy.
- Mix in the vanilla extract and heavy cream until the frosting reaches a spreadable consistency.
- Divide the frosting into separate bowls and tint each with gel food coloring to achieve your desired colors for the geode crystals.
3. Level and Stack the Cake Layers:
- Use a cake leveler or a serrated knife to trim the domed tops off the cooled cake layers to create a flat surface.
- Place one cake layer on a cake board or serving platter and spread a layer of colored buttercream frosting on top using an offset spatula.
- Stack the remaining cake layers on top of each other, spreading frosting between each layer. Ensure the layers are level and aligned.
4. Crumb Coat the Cake:
- Apply a thin layer of plain or lightly tinted buttercream frosting around the sides and top of the stacked cake to seal in any crumbs. This is known as a crumb coat.
- Chill the cake in the refrigerator for about 30 minutes to firm up the crumb coat.
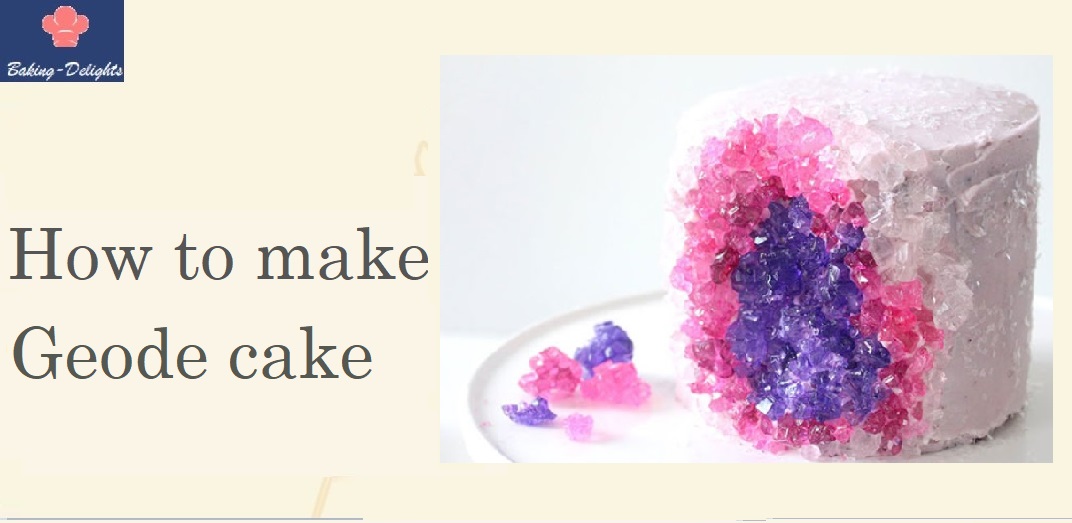
5. Decorate the Geode:
- Using a small paintbrush or piping bag, apply clear piping gel or corn syrup to the areas on the cake where you want to create the geode crystals.
- Press rock candy or sugar crystals into the sticky areas, layering them to create depth and texture.
- Mix edible silver or gold luster dust with a small amount of clear alcohol or lemon extract to create a metallic paint. Use a small paintbrush to add shimmer and highlights to the crystals.
6. Finishing Touches:
- Once the geode decoration is complete, you can add additional accents such as edible gold or silver leaf, edible glitter, or fresh flowers to enhance the overall appearance of the cake.
7. Serve and Enjoy:
- Display your stunning geode cake on a cake stand or pedestal for maximum impact.
- Slice and serve the cake to reveal the mesmerizing crystal interior, and enjoy the amazed reactions from your guests!
Tips for Success
- Use a sturdy cake recipe that can support the weight of the frosting and decorations.
- Experiment with different colors and shapes of rock candy or sugar crystals to achieve the desired effect for your geode cake.
- Take your time when applying the frosting and decorating the cake to ensure precision and attention to detail.
- Chill the cake in the refrigerator between decorating steps to prevent the frosting from melting and maintain the stability of the design.
Creating a geode cake is a rewarding and creative endeavor that results in a visually stunning dessert centerpiece for any special occasion. With the right techniques and a bit of patience, you can craft a masterpiece that will leave a lasting impression on your guests. Follow this detailed guide to make your own geode cake and watch as it becomes the highlight of your celebration!